

Sometimes it's necessary to completely rebuild the Amazon Web Service (AWS) infrastructure, as it may have structural issues and security problems that could lead to unpleasant situations.
I recently went through this whole process and it took a while to complete, as it was not always as intuitive as it should be. To be sure that you won't face the same obstacles, here I'll provide a step by step AWS tutorial that'll cover everything you need to know in order to configure the infrastructure management.
Let's start from the very beginning.
Creating your first VPC (Virtual Private Cloud)
You've just created your AWS account and now it’s time to start building your own infrastructure. I guess you would like to have a production environment and also a test environment (QA), right?
If that's the case, it’s important to segregate your environments. Don't use the same VPC for both. Instead, you should create different VPC’s with their own set of subnets, security groups, route tables, and internet gateways in order to ensure that your environments are independent.
This will avoid the situation in which your QA environment gets attacked and your production environment follows shortly after.
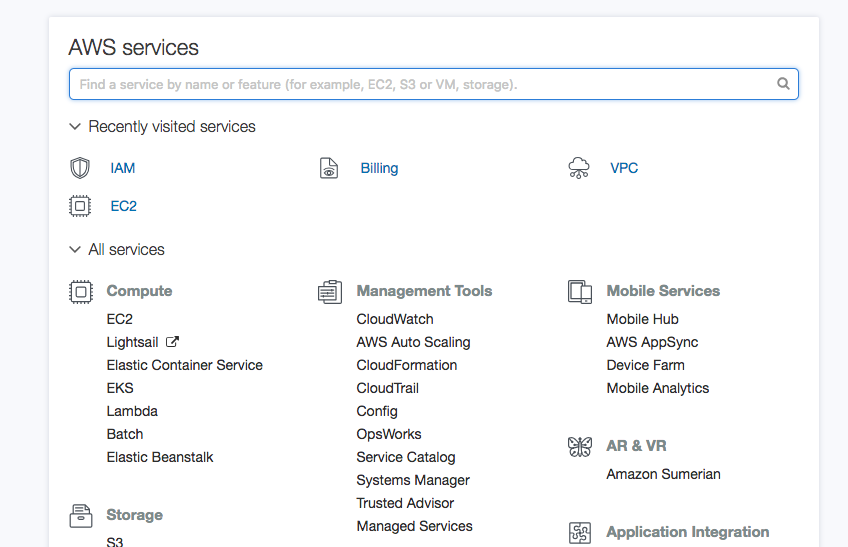
So, let’s create the first VPC. You can start by selecting VPC on the main dashboard:
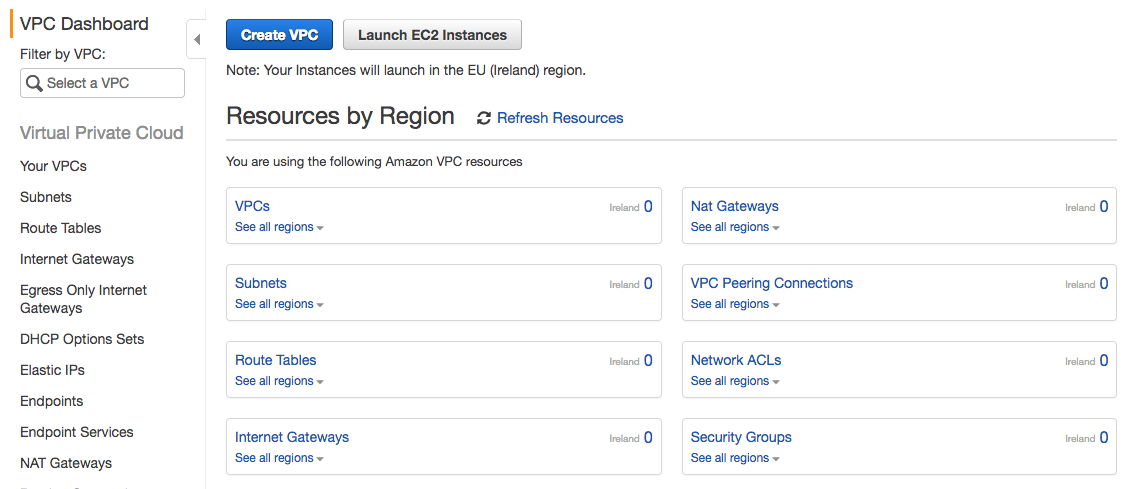
Next, click on Create VPC:
You’ll get this screen:

The next step is really important since it's where you can choose your VPC configuration type. Imagine that you have a simple application (a simple website such as WordPress and MySQL, for instance), your best VPC configuration would be the first one (with a single public subnet).
However, if you have a large application built with microservices and some of them require public access, while others don’t, the second option is the best.
Just a quick explanation on subnets: they're network containers (nodes) inside your VPC and allow you to create access rules (traffic and public access for instance).
Now, let’s assume that you want to create a VPC with public and private subnets. Just select the correct option (on the previous image) and click select to see this screen.

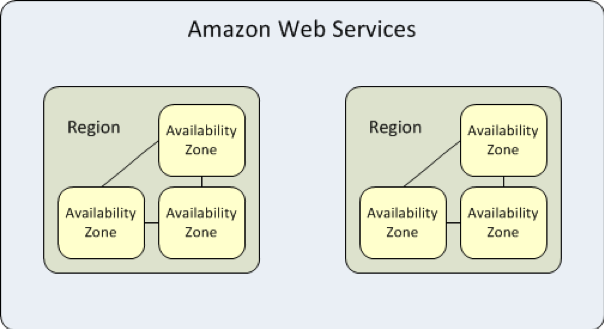
You can configure the IP ranges according to your needs and also name your subnets. Concerning the availability zones and regions, each region is organized by geographic area and each one contains the available zones that are connected.
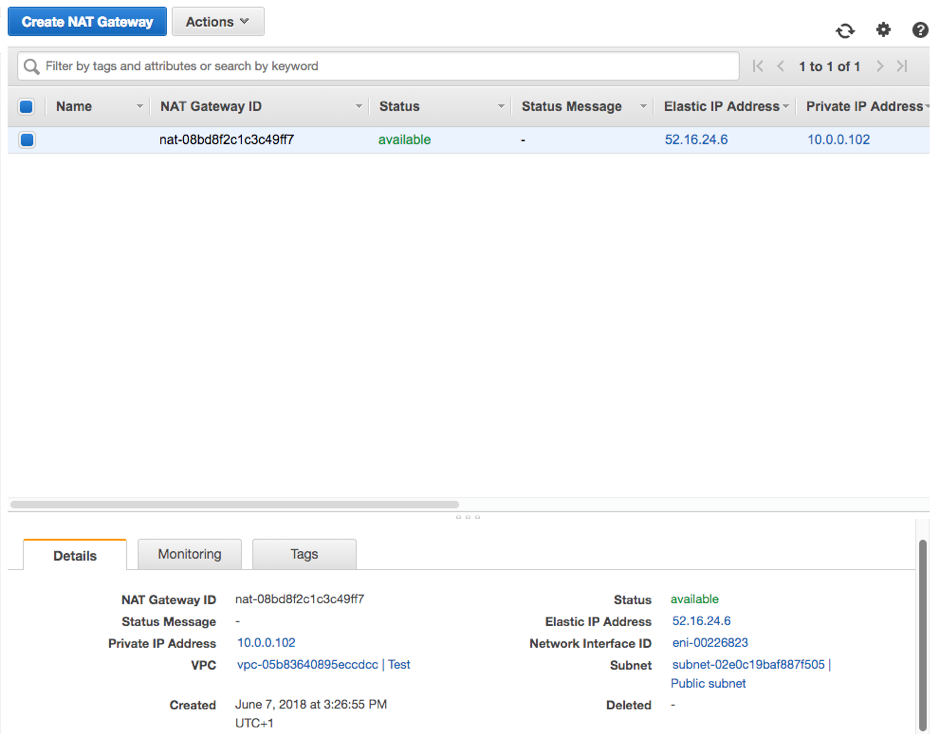
Regarding the NAT Gateway, you can use an elastic allocation IP (public IPv4 address, which is reachable from the internet) or create a NAT instance (an EC2 instance with specially configured routing tables). Personally, I would choose NAT gateway, since an EC2 instance usually has more stability issues.
Creating the VPC button
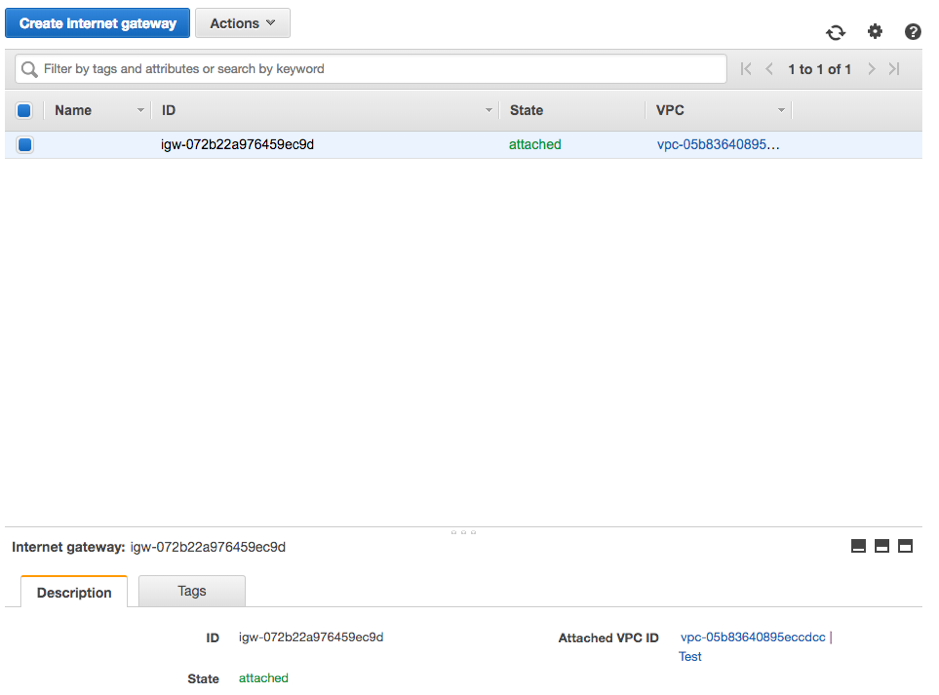
Your VPC is now almost ready for action. Firstly, as seen in the images below, you should have a set of subnets, one private and one public, a set of route tables, an internet gateway associated to the VPC by default and a NAT gateway associated to the public subnet. Alternatively, you can choose the NAT Instance.
Please note that NAT Gateways are not included in the free tier of AWS.
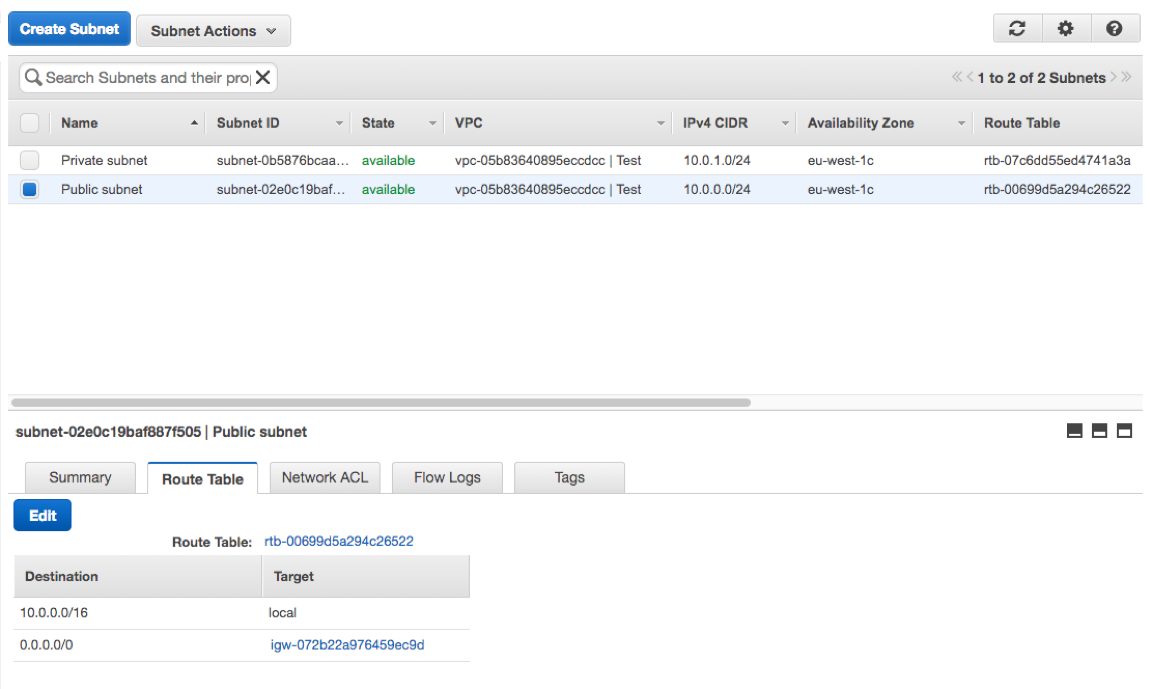
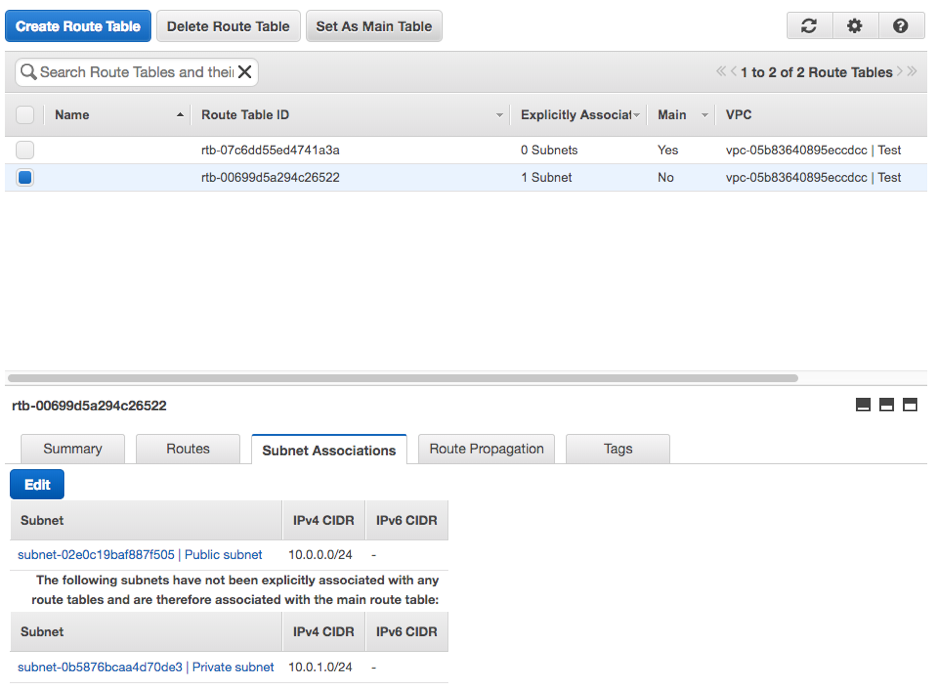
Just a side note on the routes: you’ll find that one of them is pointing to the two subnets to ensure that they can talk to each other.
The first steps are done and we now have a fresh new VPC ready to rock! Now let’s cover other important subjects, such as creating EC2 instances.
Should we allow direct access (SSH) to the EC2 instances? We definitely shouldn't! Even if you setup a different port, block the root access and permit access only through private key file (PEM file), the answer is still the same.
The best solution is to use a VPN access to a Bastion server (an EC2 instance that can connect via SSH to all the machines in the VPC). This Bastion should be accessed only with an authorized key (PEM file key generated by AWS) and configured in a nonstandard port.
Creating the Bastion server
Start by going to EC2 (Compute section) and then click on “Launch instance”. Select the base AMI (Amazon Machine Image) and then instance type. After that, you’ll reach the third step and this is one is very important. The machine subnet should be public.
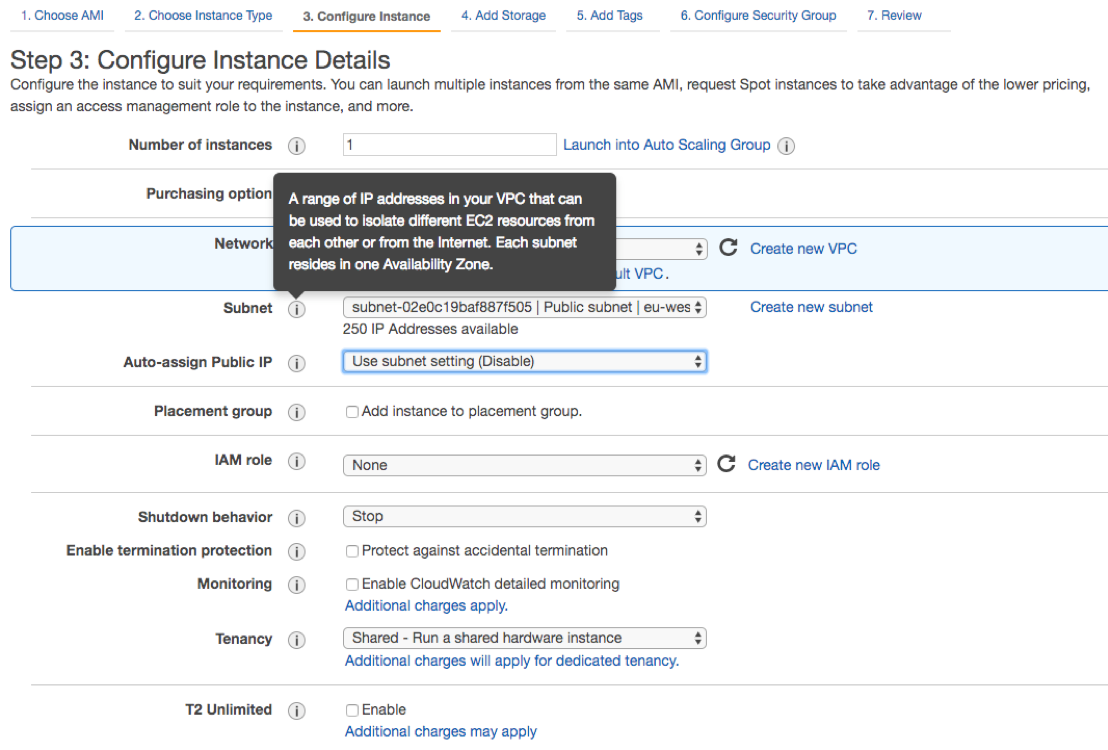
Just select the public subnet on the list and then change the option Auto-assign Public IP to enable. If you don’t need any extra storage, you can click on the top link 6. Configure security group.
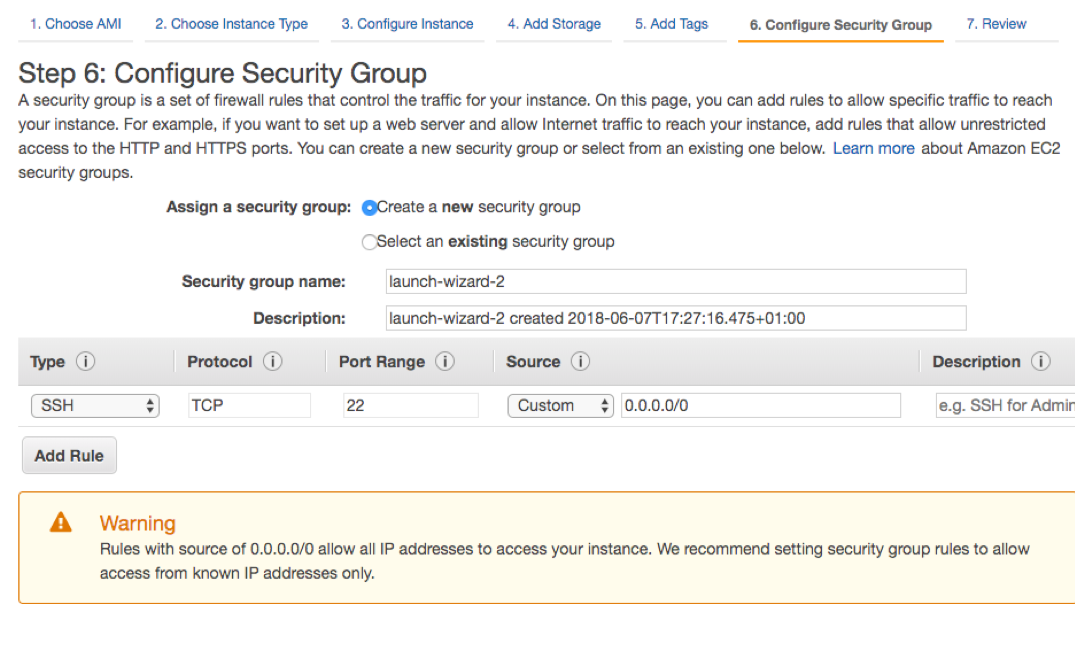
Pay special attention to the group name and description as this is a very important step. I advise you to use good descriptive names as, for instance, test-public-ssh and a recognizable description. Avoid using the default names and always check if there’s already any rule created or you will end up with a bunch of repeated rules.
If you want to change the default port you will also need to add a custom rule. Just click in Add Rule, but note that you should do this after launching the instance and any change has to be made also in the EC2 instance (operative system) or else you will not be able to access it via SSH.
Proceed by clicking on Review and launch. You’ll notice a message on the top of the screen.
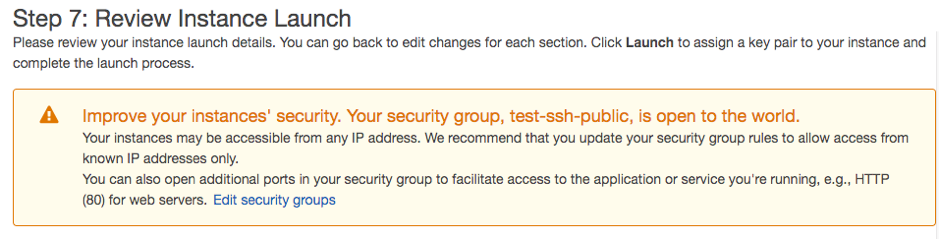
You’re getting this message because this machine allows public SSH access.
It means we're good to go. Just click on the Launch button, select the keys or create a new set. Always keep your keys in a safe place, don’t use a VCS to store them.
Creating an instance in a private subnet / configuring SSH access
Up to this point, I've covered the VPC creation and the Bastion server creation. Next, we'll create an instance in a private subnet and configure the SSH access.
Let’s start by clicking on the Launch Instance button:
Here the steps are the same, choose an AMI (I’m using Ubuntu 14.04 LTS, included in the free tier):

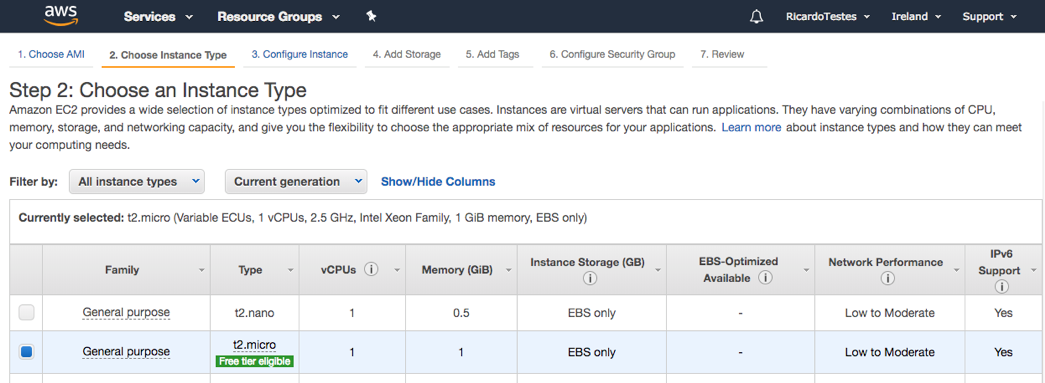
Then you choose the instance type (I’m using a free tier instance, t2.micro):
After choosing your instance type, click on Next: Configure Instance Details.
You’ll be presented with the following screen:
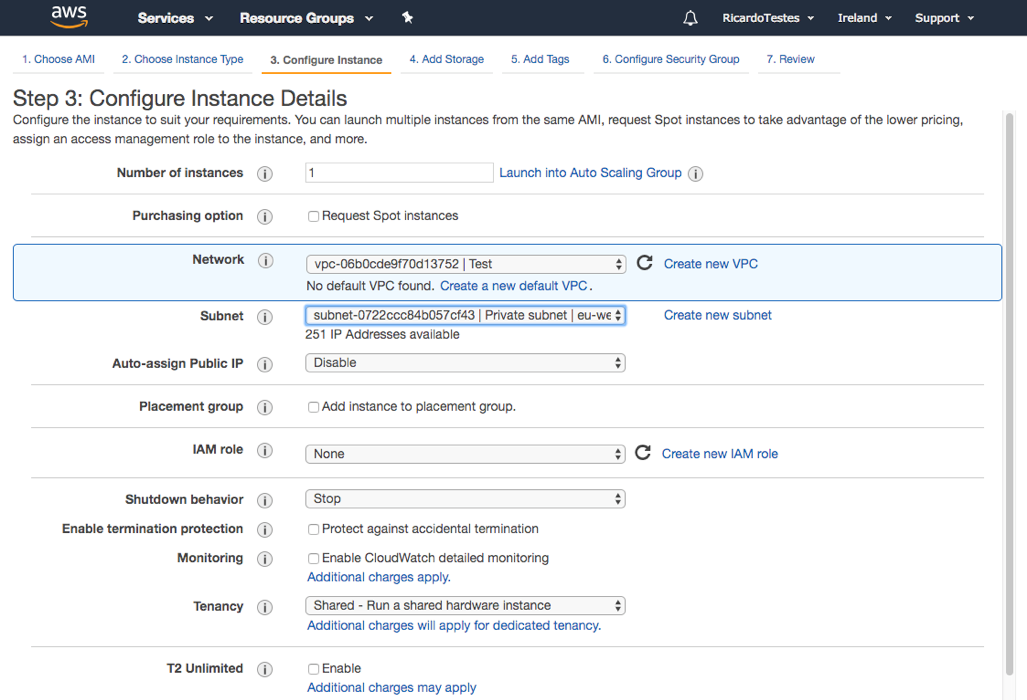
This machine will not have public access, it will be used to run a service that should not be accessible to the internet.
So, in the subnet option, we should use the private subnet previously created with the VPC and choose disabled in the auto-assign IP option. If you don’t want to modify the storage or add tags you can click on Configure Security Group on the top.
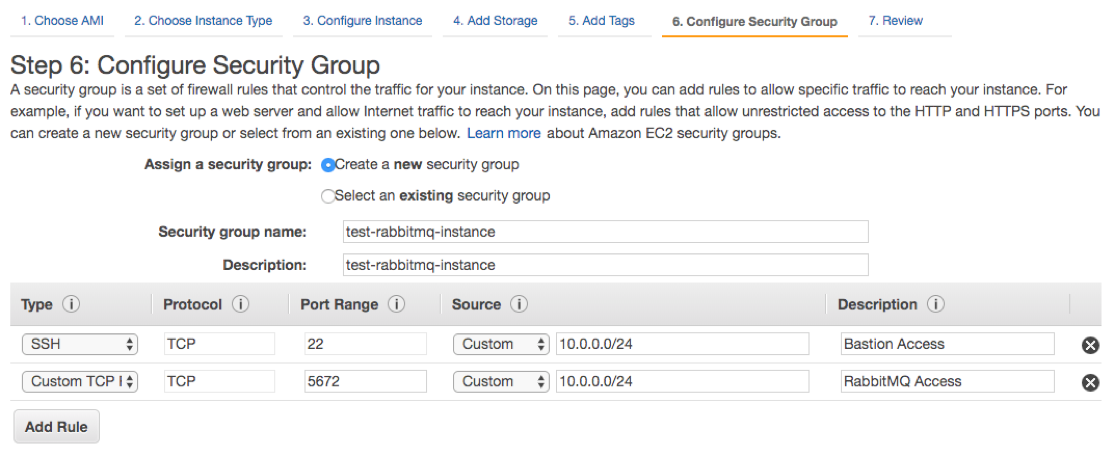
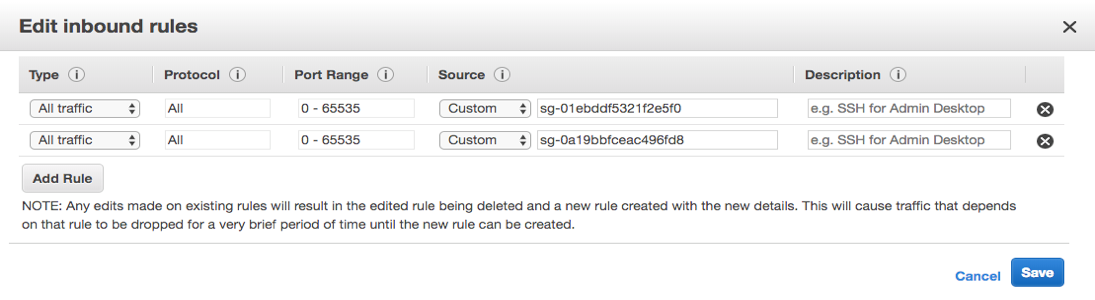
Please note the difference between this one and the security group used for Bastion, as in here we’ll only allow SSH access to the private IP range (it may vary according to your subnet, be sure to check it).
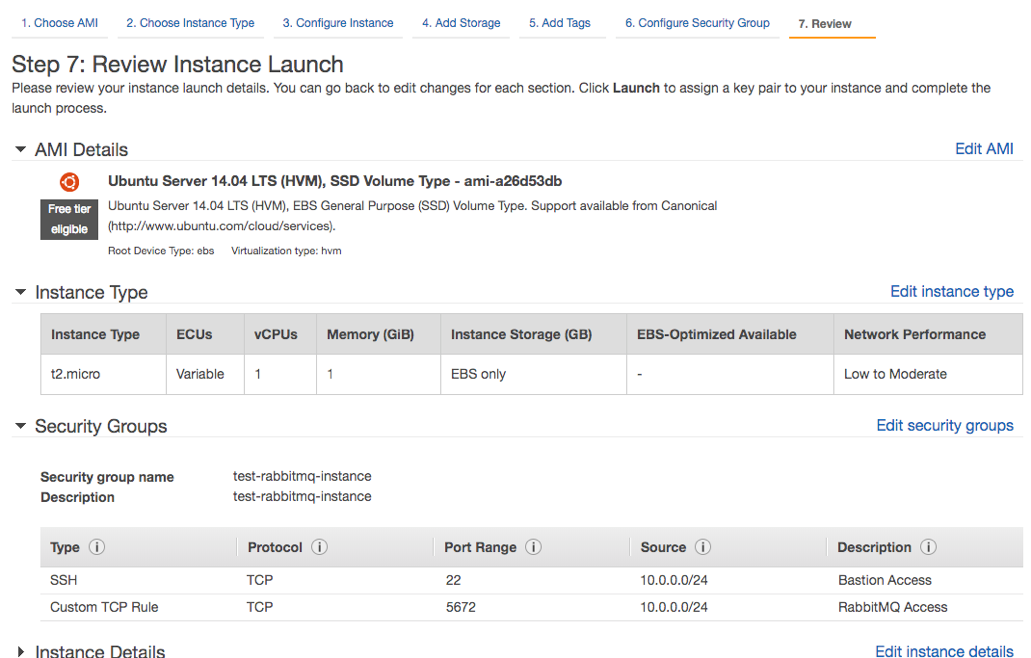
You can also add rules according to your needs (HTTPS, RabbitMQ, etc.) for a desired IP range (here I’ll add the rule for RabbitMQ - port 5672). If you don’t want to add more rules just click on Review and Launch. The next screen will appear:
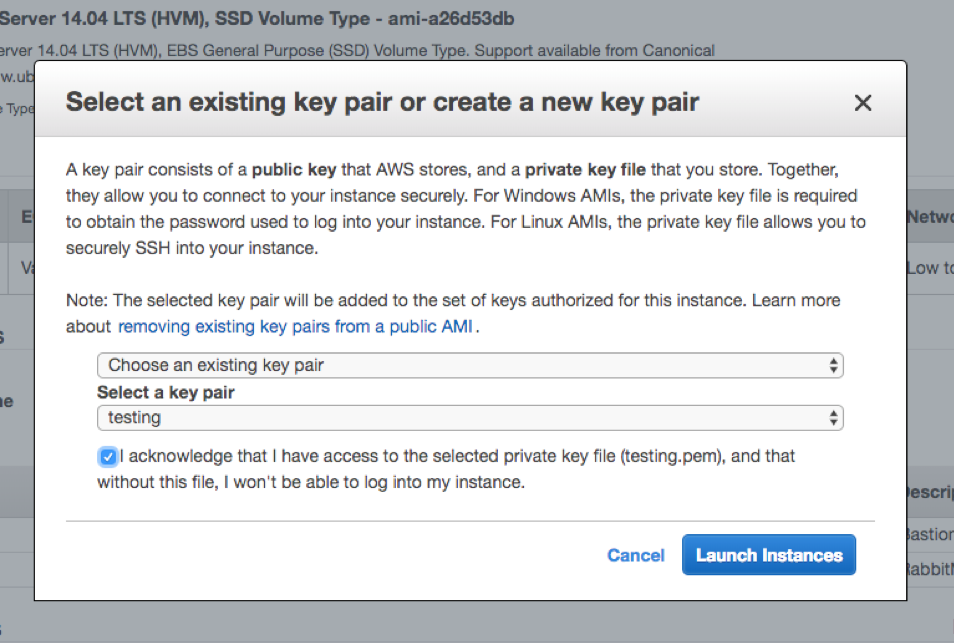
Just click on launch, choose your access key, and then click on Launch Instance. AWS will start creating your new EC2 instance:
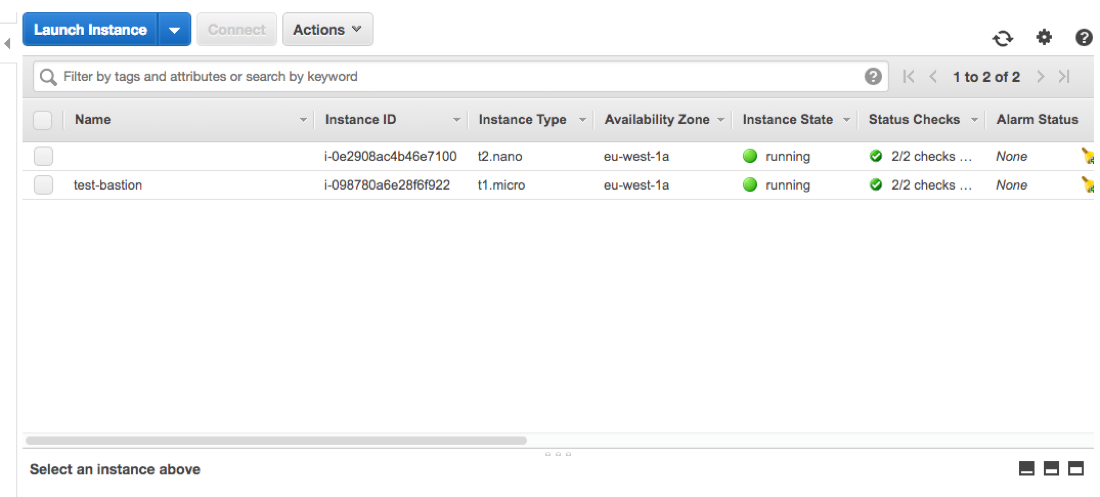
If you go to the EC2 dashboard, your new EC2 instance should be in the list:
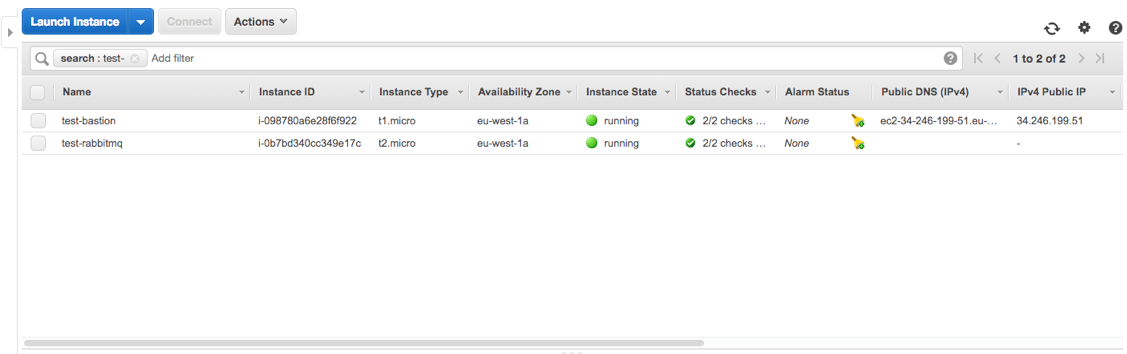
I named the new instance test-rabbitmq. If you look at the public DNS column you’ll find out that it does not have a public DNS. That’s because it was created within a private subnet.
Testing the SSH Access
Until now we've built a VPC with a private and a public subnet and we have two machines: one used for SSH access that connects to the private zone and a machine in the private zone (RabbitMQ). So, how do you test the SSH access?
Just go to EC2 dashboard, get the Bastion IP and go to your console. Don’t forget to add the private key to the command:
ssh -i testing.pem [email protected] -A
You can now connect to your Bastion! Now let’s go deeper and try to connect to your RabbitMQ instance:
ssh -A [email protected]
You can now connect to the private instance!
As you've noticed, I’ve used some parameters on the commands above, but you can avoid this by configuring your config file in the .ssh directory (in your home directory). You can also configure the config file in the Bastion server.
So let’s test the internet access in the private EC2 instance:
ping google.com
Everything is working properly, but just a note, if you use a NAT instance instead of a NAT gateway, don’t forget to change the security groups, including the private machine group in the rules.
Quick recap
You should limit the SSH access, create public and private subnets, segregate your environments (production, development, QA), each environment (VPC) should have his own set of route tables, subnets, etc.
Be careful with the security groups, only allow necessary protocols and ports and avoid the external access when possible.
Much more could be written about AWS but it’s virtually impossible to cover everything in one article only. There are still some uncovered subjects, such as S3 safety, Bastion access through VPN, and of course, using Ansible to get things up and running. In any case, here you find everything that you need to get started right away!
At Imaginary Cloud we work with a wide tech stack, including AWS. If you need help with this tech or similar ones in your software development project, we have a team of experts waiting for you! Drop us a line here!
Found this article useful? You might like these ones too!